How to create a sticker pack in Adobe Illustrator Under 2 Minutes?
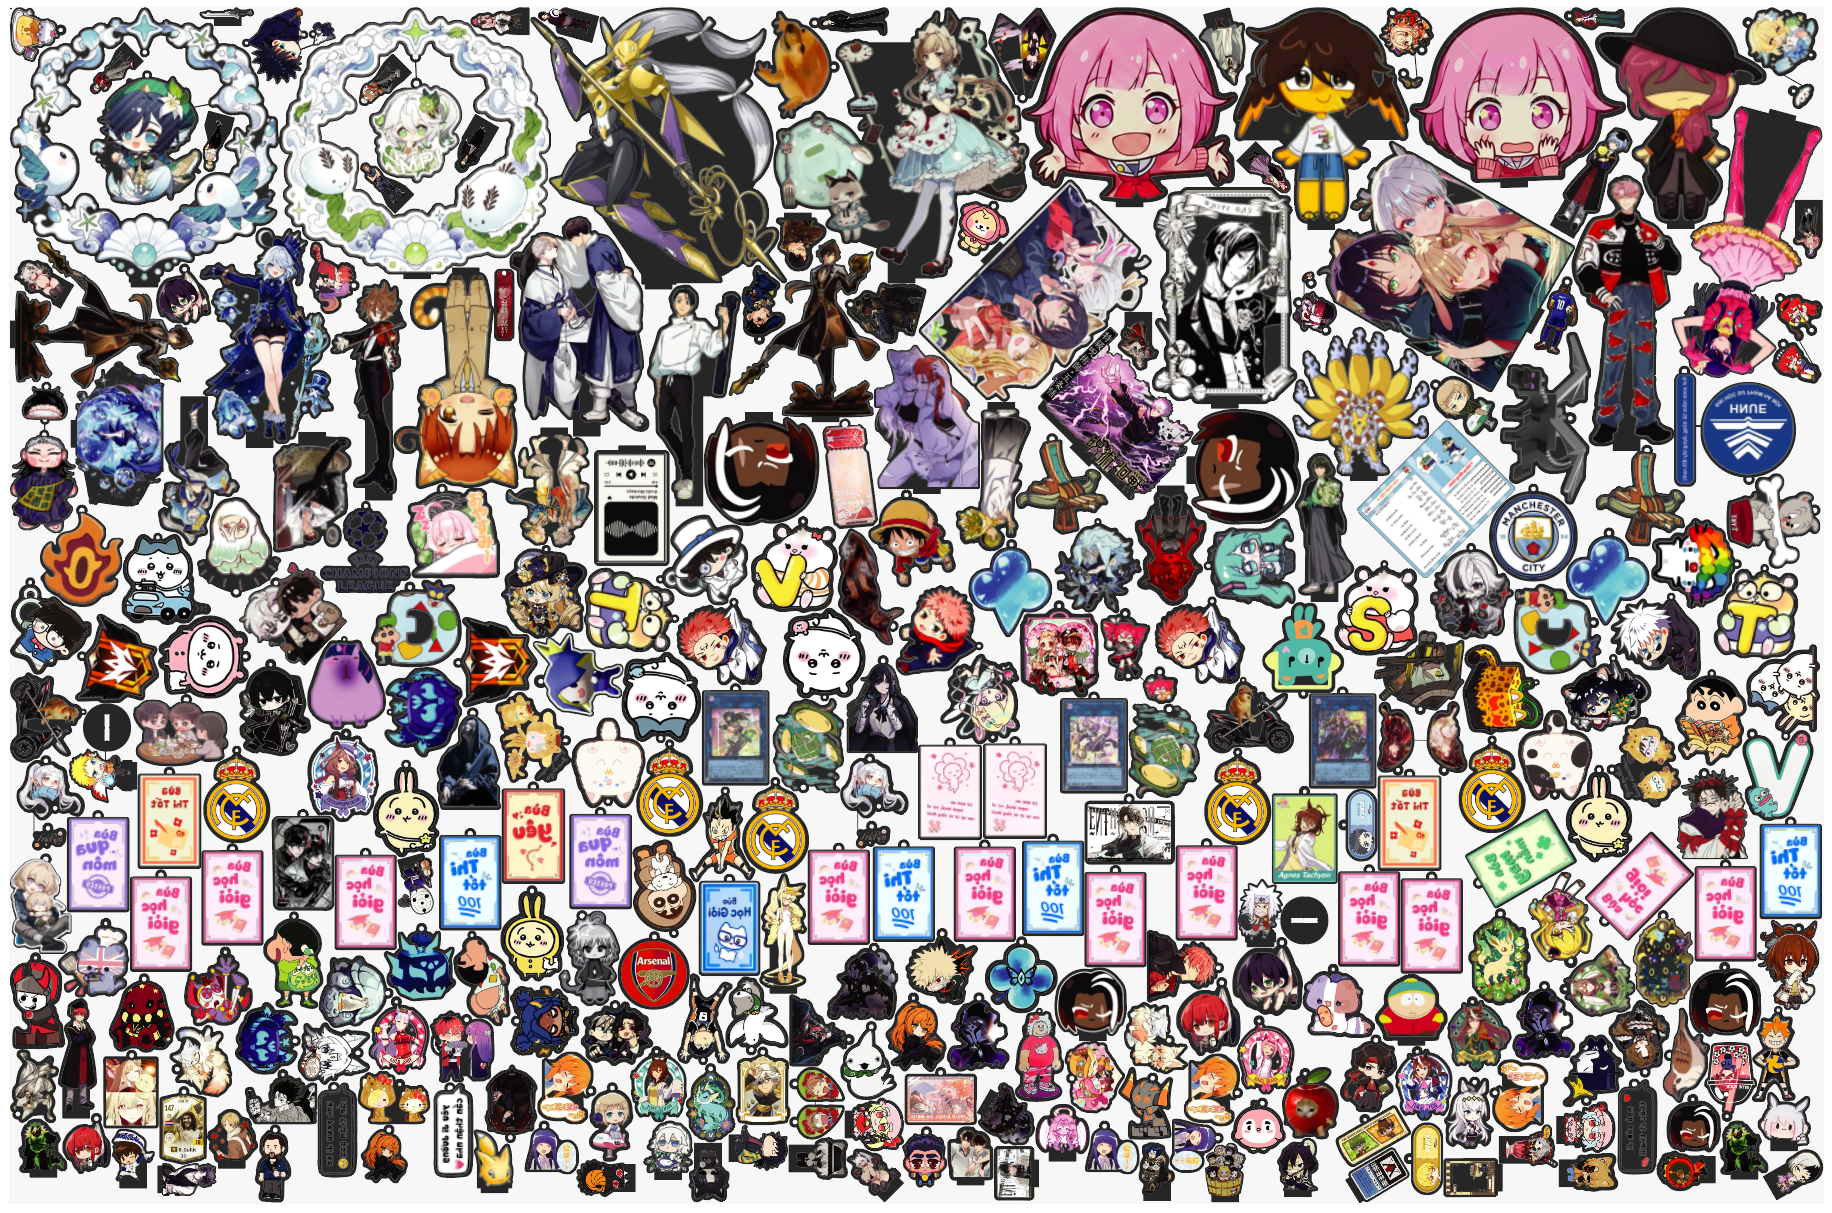
Preparing a sticker pack for print involves two main costs: the designer's time spent arranging the assets and the physical material used during production.
Manual arrangement is inefficient. Designers typically drag and drop individual vector groups to fit an artboard, adjusting spacing by eye. This process takes time and almost always leaves usable material empty. This article explains how to automate the sticker layout process in Adobe Illustrator using true-shape nesting algorithms.
The Problem with Standard Alignment Tools
The core issue with manual layout or standard Illustrator distribution tools (like the Align panel) is the reliance on bounding boxes.
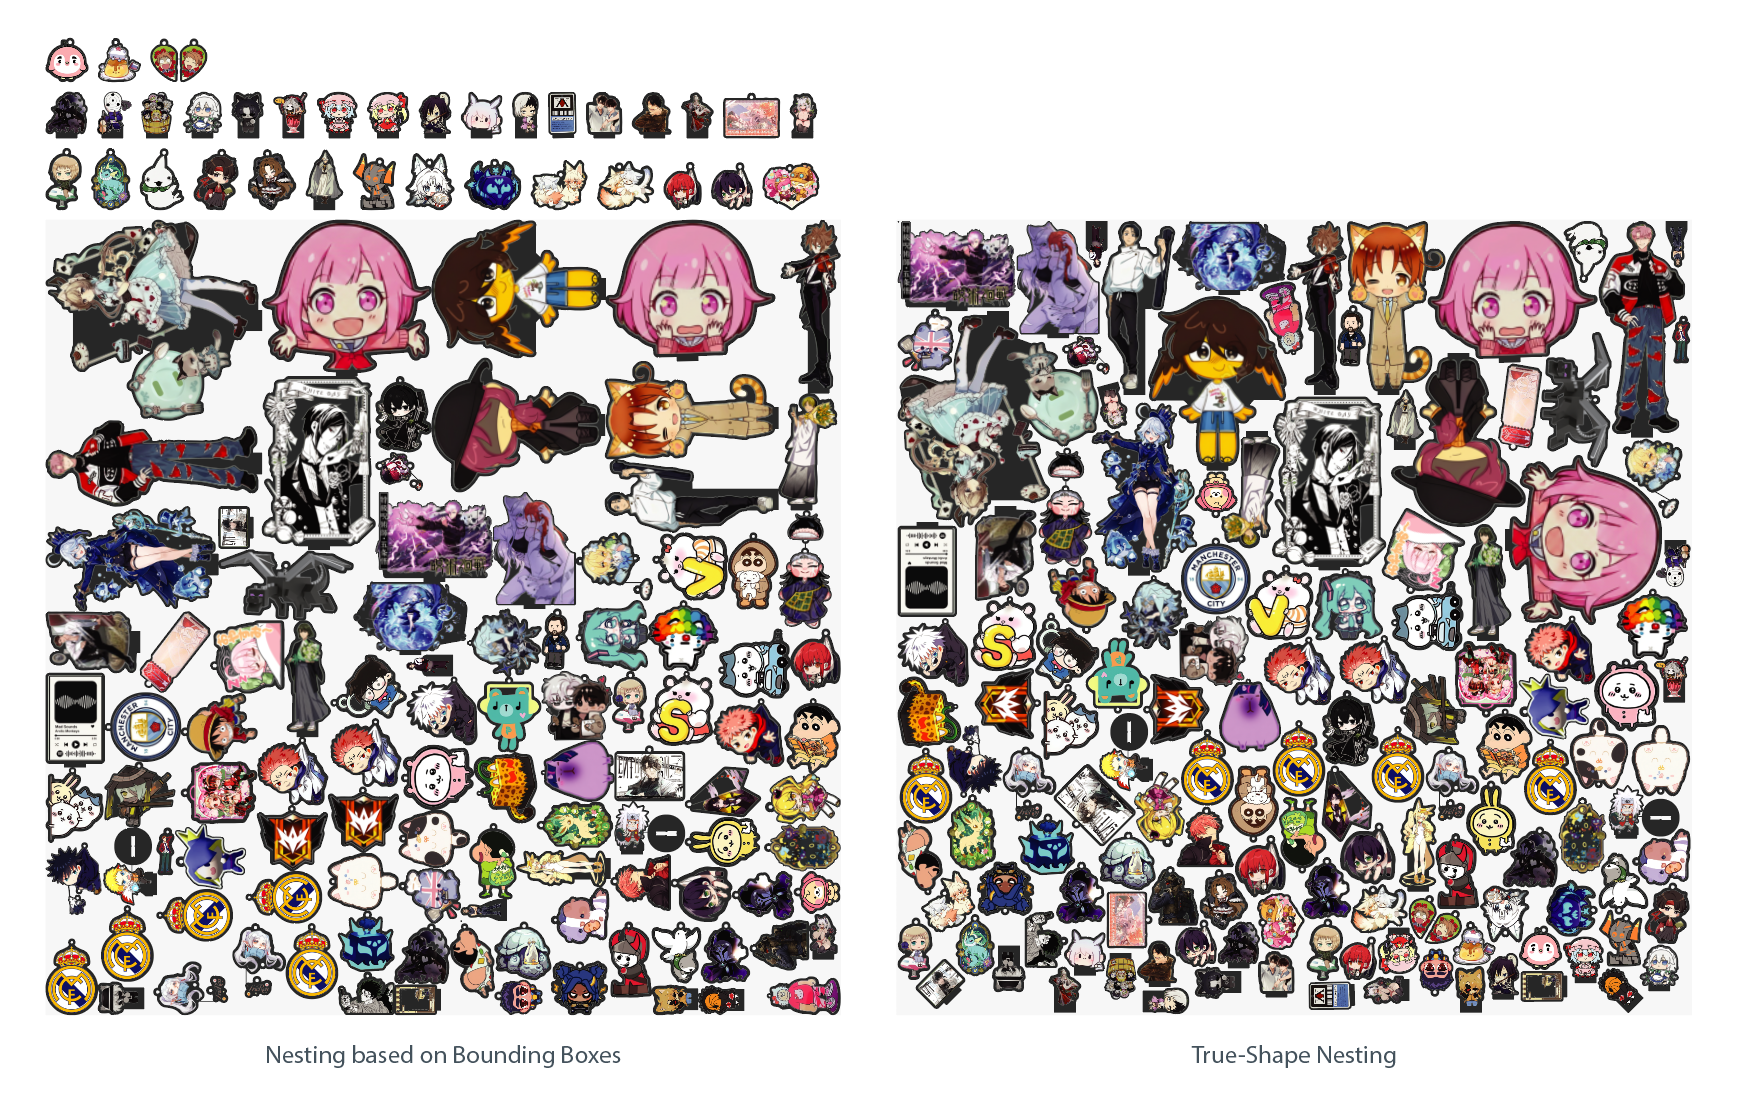
A bounding box is a rectangular frame that encompasses the widest and tallest points of a vector object. When you use default distribution scripts, the software calculates the distance between these rectangular frames, not the actual shapes.
If you are printing circular, diagonal, or irregular stickers, bounding box alignment treats the empty space around the sticker as solid matter. This prevents objects from interlocking, resulting in significant material waste on the final vinyl sheet.
The Solution: True-Shape Nesting
To optimize material usage, the layout method must analyze the actual vector contours of the artwork. This approach is called True-Shape Nesting.
The Arrange Master plugin for Adobe Illustrator includes a Dense Packing algorithm built specifically for this task. Instead of reading rectangular frames, the algorithm scans the physical vector paths, detects internal cavities, and evaluates multiple rotation angles to pack the objects as tightly as possible.
Arrange Master is a commercial plugin, but a free demo version is available for evaluation. You can also observe the Dense Packing algorithm's real-time performance by viewing the dedicated video demonstration:
Here is the automated workflow for generating a print-ready sticker pack.
Step 1: Prepare the Vector Groups
Before running any automation, ensure your file is structured correctly for a print-and-cut workflow. Each individual sticker must be grouped. A standard sticker group should contain:
The raster or vector artwork (the print layer).
The die-cut line (usually a specific spot color stroke).
The white offset or bleed area.
Step 2: Define the Container
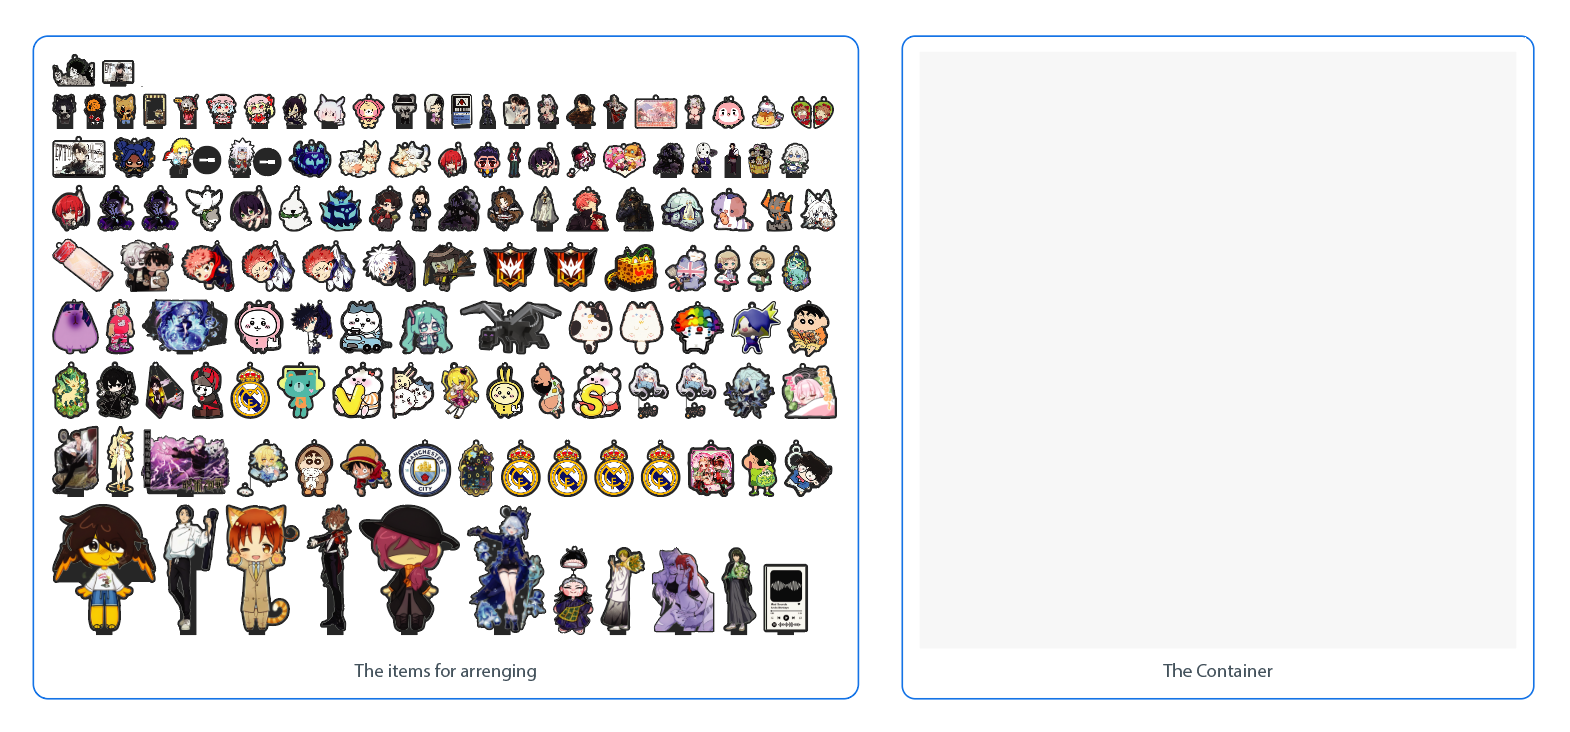
Draw a single rectangle on your artboard that represents your physical print media (for example, an A4 sheet or a 12x12 inch vinyl square). Arrange Master identifies the largest object in your selection and automatically assigns it as the boundary container.
Step 3: Execute the Dense Packing Algorithm
Select your container rectangle and all the sticker groups you want to pack.
Open the Arrange Master panel (Window > Extensions > Arrange Master) and navigate to the Greedy Layout tab. Configure the following parameters:
Dense Packing: Enable this checkbox to activate true-shape vector analysis.
Min. Spacing: Set this to your required safety margin (e.g., 2mm). This ensures the plotter blade has enough room to cut without damaging adjacent stickers.
Free Rotation: Enable this to allow the engine to test 24 different angles per object to find the most efficient fit.
Click Arrange. The plugin creates a temporary session, hiding your original files and processing duplicates. The algorithm places large objects first to build the structure, then fills the remaining gaps with smaller stickers.
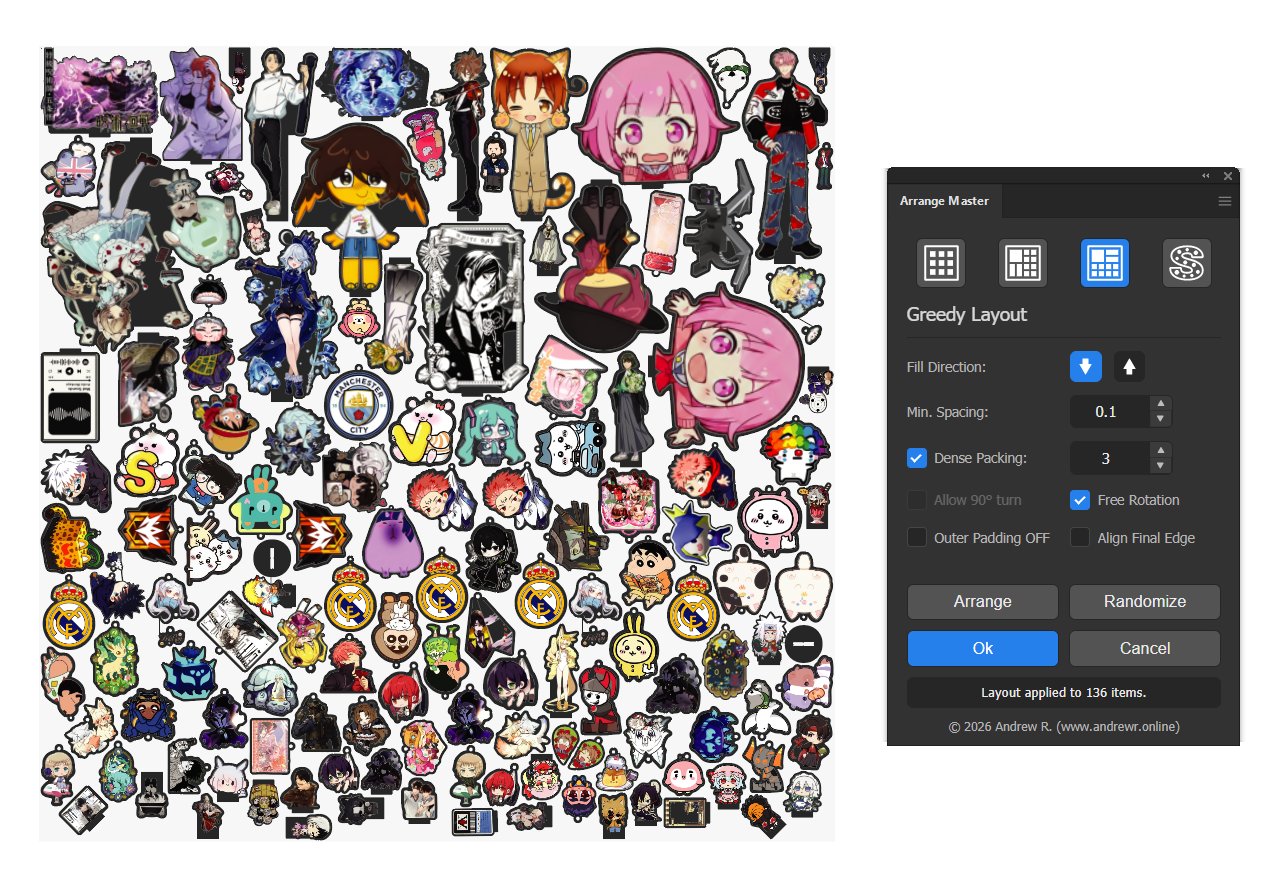
If you are satisfied with the density, click Ok to finalize the layout. If you want a different configuration, click Randomize to force the algorithm to recalculate a new pattern.
Prepress Layer Separation
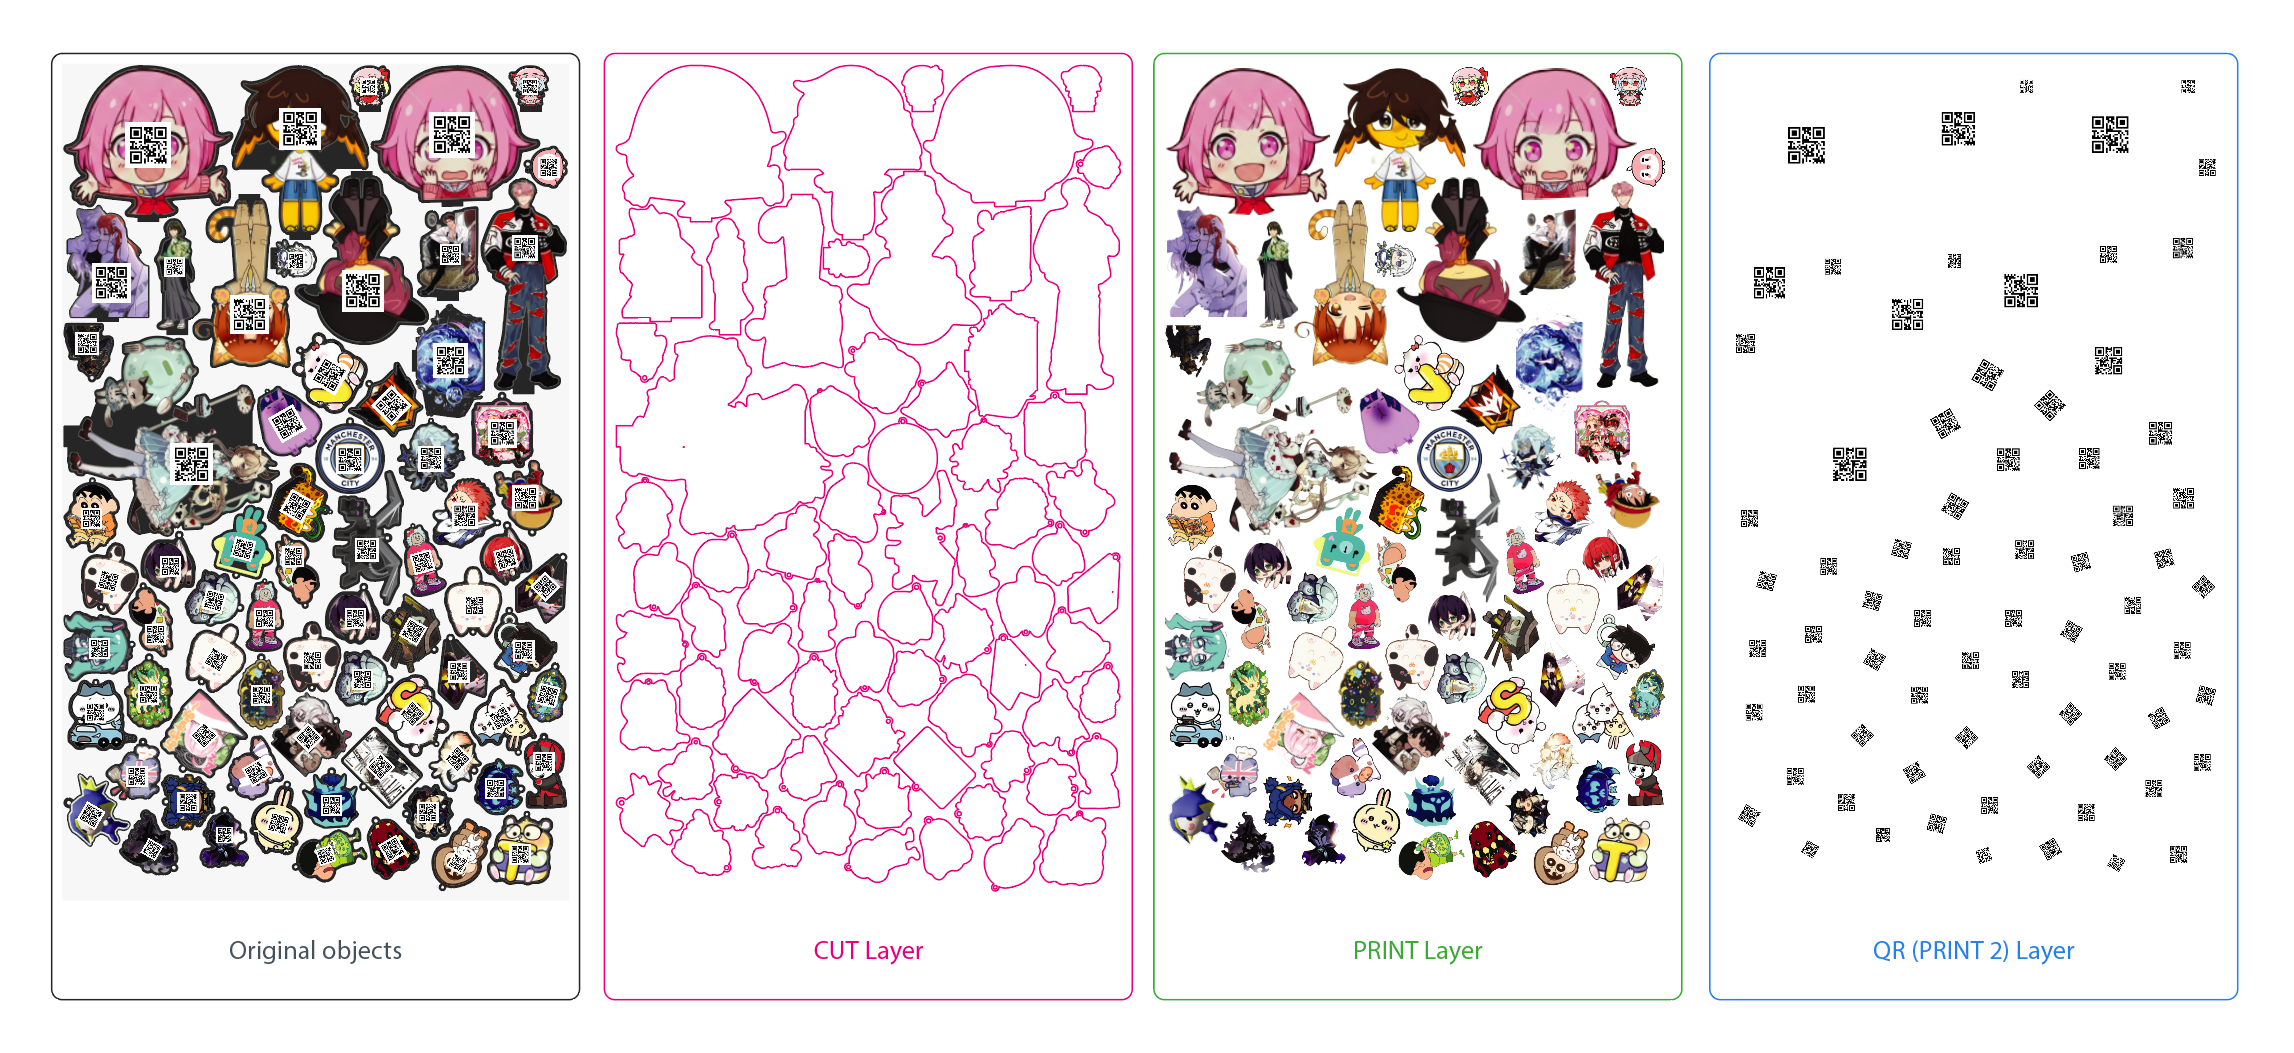
A packed layout is only half of the job. Most commercial RIP software requires the cutlines and the printable artwork to exist on strictly separate layers.
Manually extracting the cutline from hundreds of nested groups is prone to human error. To handle this, use the Prepress Splitter script (distributed with Arrange Master plugin).
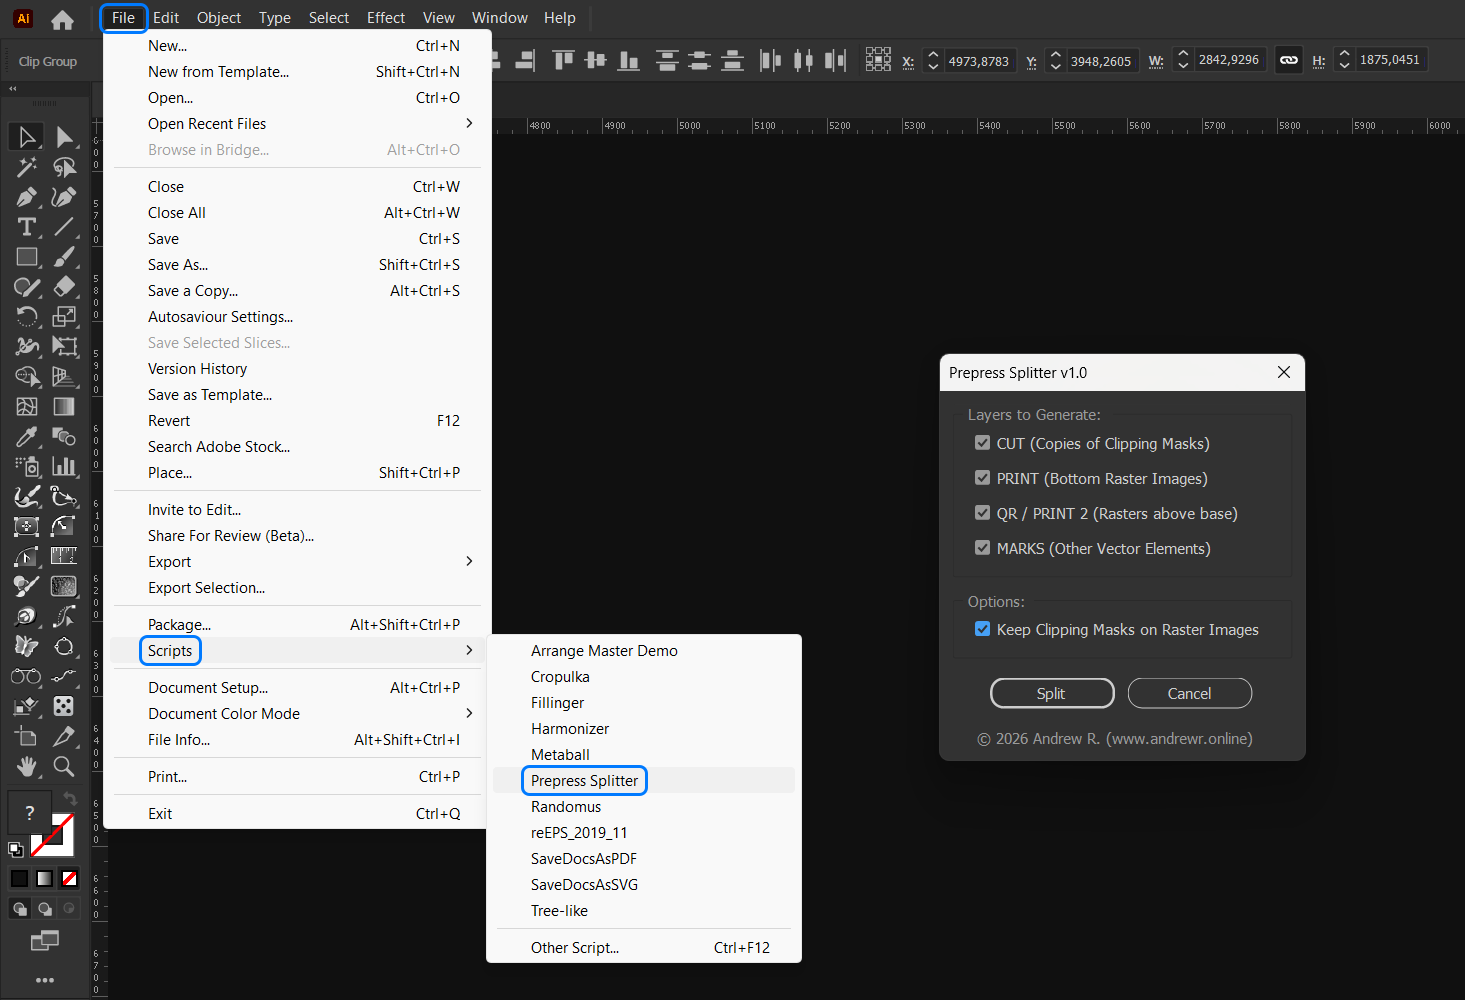
Select your newly nested layout and run the script (File > Scripts > Prepress-Splitter.jsx). The script analyzes the Z-order of every nested group. It extracts the top vector paths (cutlines) and moves them to a dedicated "CUT" layer, while moving the raster and base vector elements to a "PRINT" layer.
Summary
Switching from manual alignment to algorithmic true-shape nesting changes the economics of sticker production. By defining a container and letting the Dense Packing engine analyze the vector paths, you eliminate manual dragging. Setting a precise "Min. Spacing" value guarantees safe plotter cuts, while the optimized density directly reduces the linear footage of vinyl required per batch.