How to Save Material and Time in Wide-Format Printing
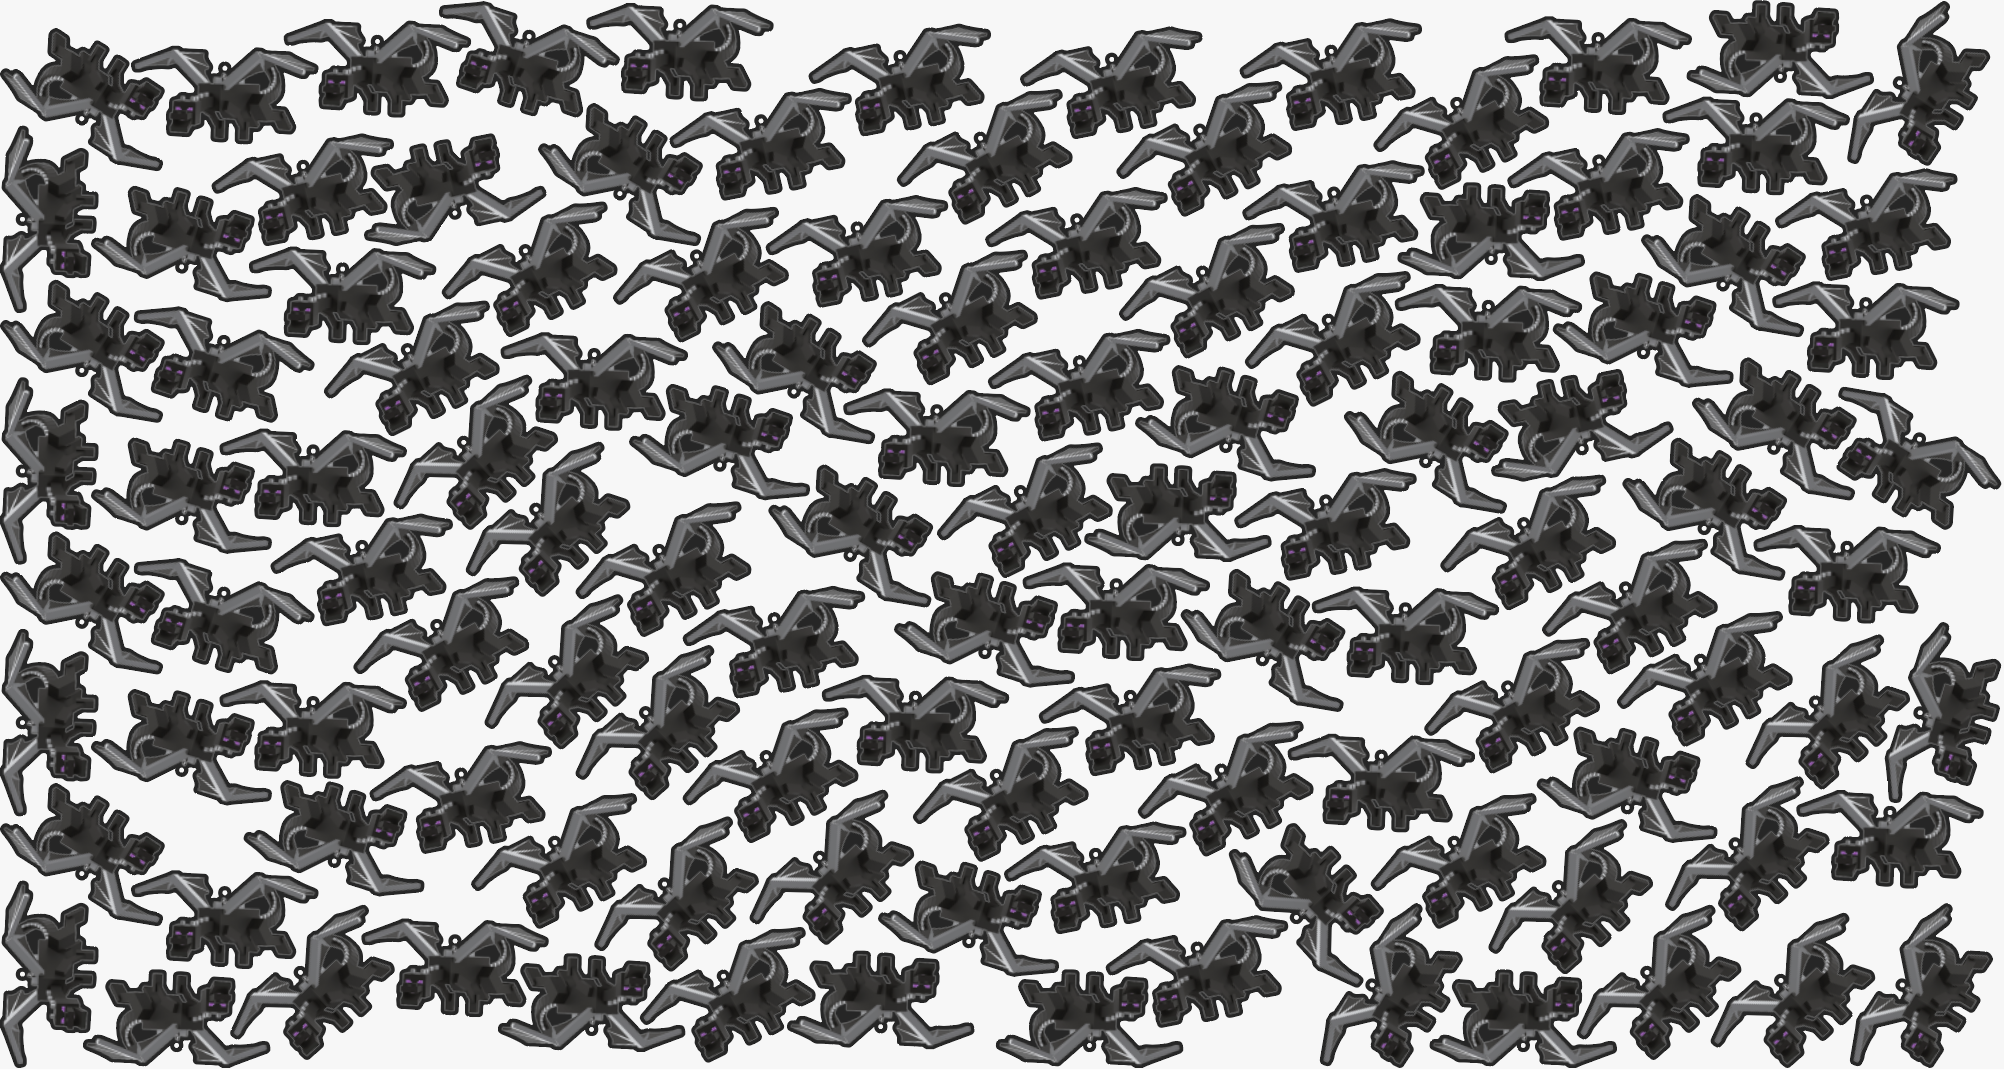
Prepress preparation for wide-format printing involves a significant amount of routine manual work. When a print shop receives an order for 500 custom die-cut stickers or apparel patterns, the prepress operator must place these items onto a specific roll width.
Operators spend hours manually dragging, rotating, and nudging individual objects in Adobe Illustrator to minimize blank space on the vinyl or transfer paper. This manual arrangement creates a bottleneck in production.
Arrange Master is an Adobe Illustrator extension that automates this prepress layout process. Below are specific workflows for arranging different types of objects to minimize manual labor and reduce media consumption.
Arranging Irregular Vector Objects
When working with diverse, non-rectangular vector shapes, manual nesting is extremely slow.
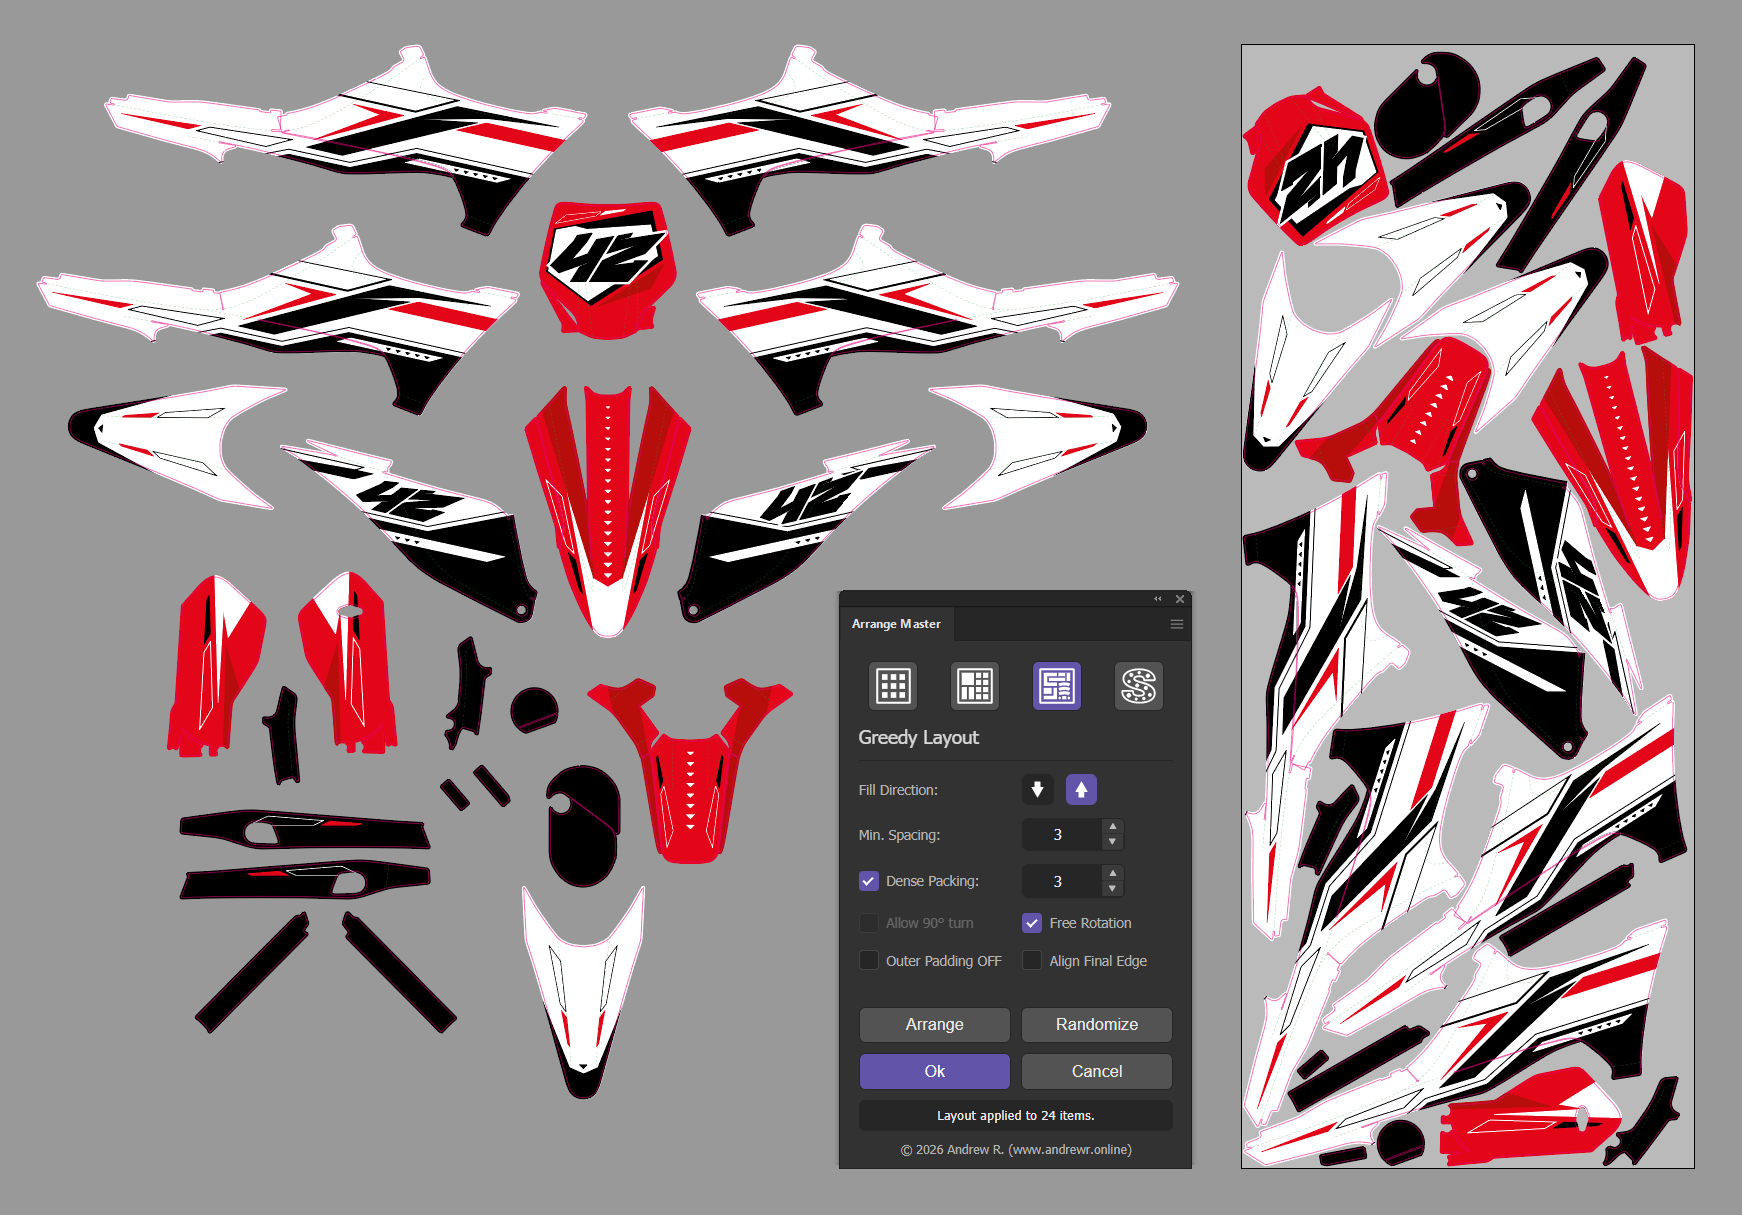
To automate this, select the Greedy Layout tab and enable the Dense Packing checkbox. This activates the True-Shape nesting engine, which analyzes the exact contours of the vectors rather than their square outer boundaries.
If your selection contains fewer than 50 objects, the engine automatically triggers Smart Euclidean Mode. This algorithm calculates the radial distance to the corner of the artboard for every possible position. It mathematically forces objects to interlock tightly, mimicking the logic of a human operator but executing in seconds.
Generating and Nesting Copies of a Single Object
Often, a client provides a single design and requests a specific quantity.
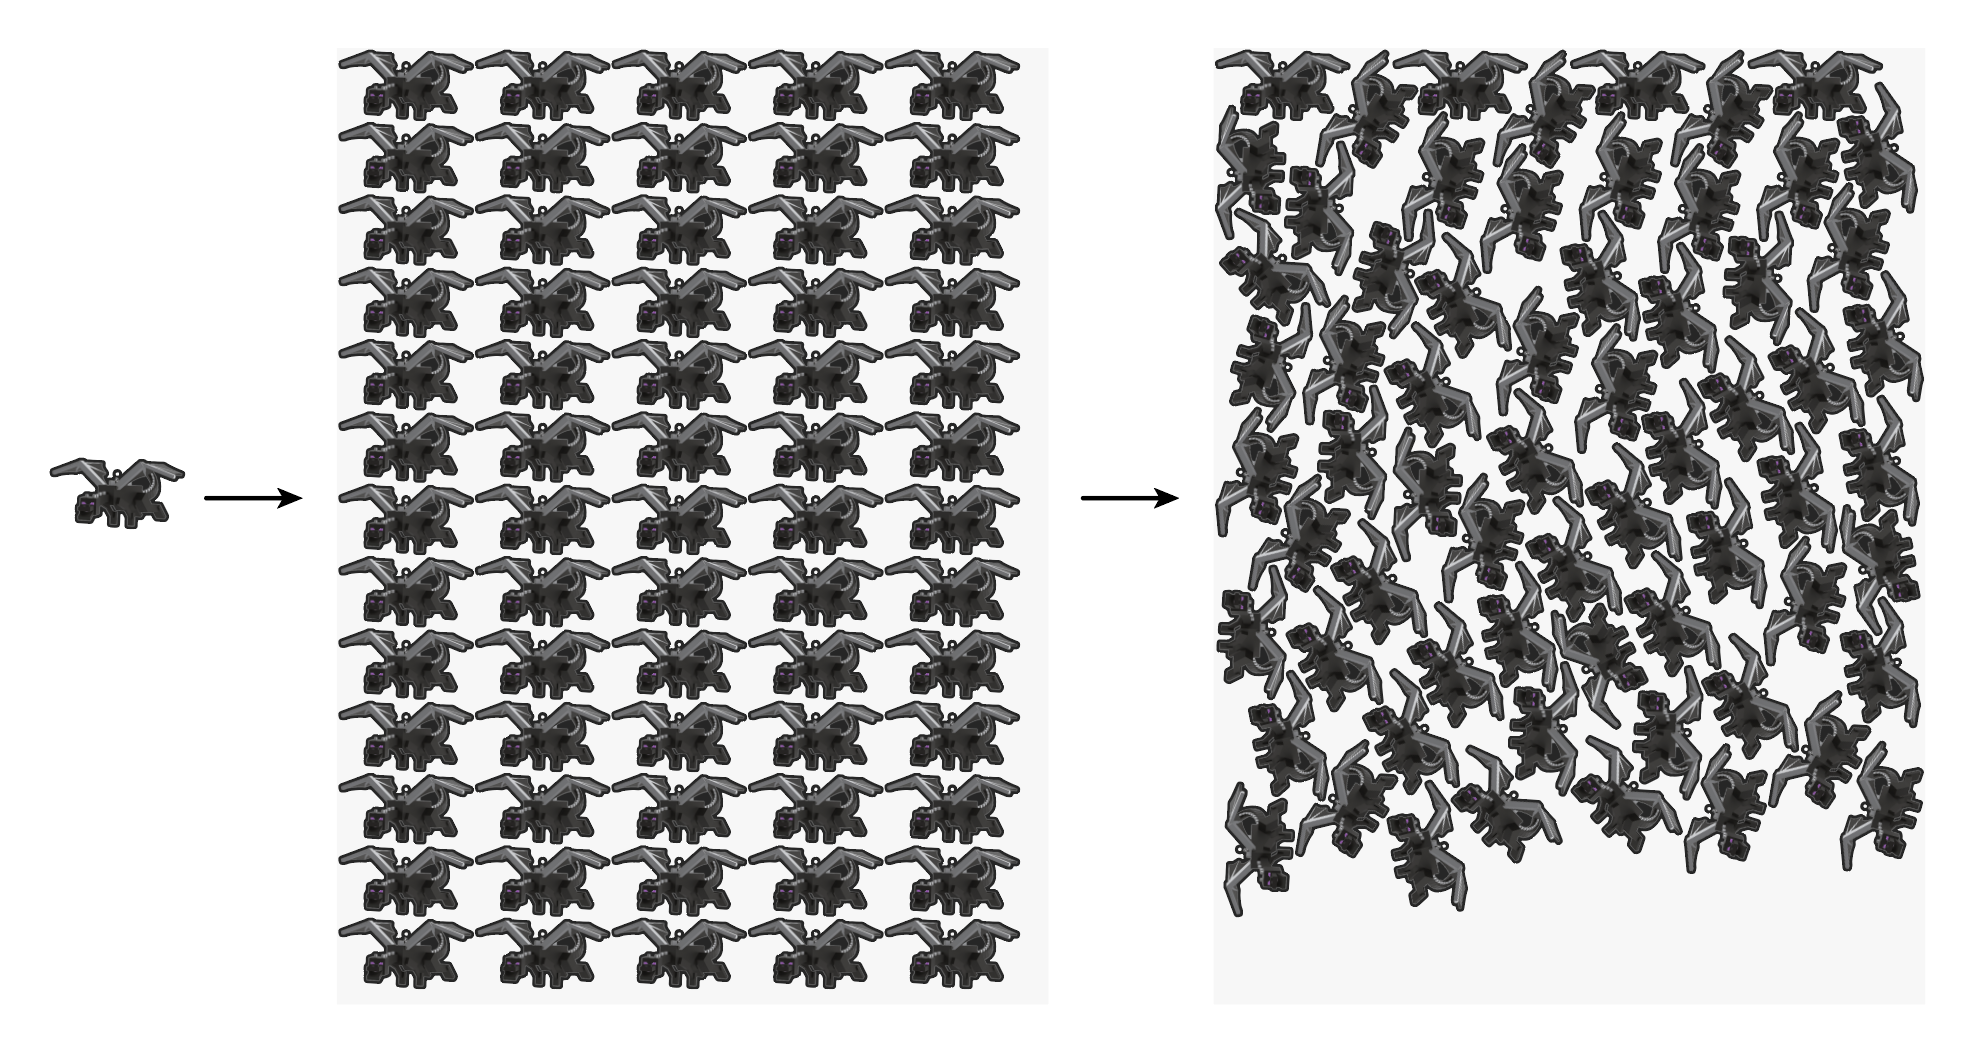
To generate copies automatically, open the Grid Layout tab and check the Single Item Fill option. Select your design and the background rectangle (which acts as your print area boundary). The script will duplicate the object to fill the defined space.
However, if the object has an irregular shape (like a curved logo), a standard grid wastes material. To fix this:
Use the Single Item Fill to generate the required number of copies.
Select all the generated copies.
Switch to the Greedy Layout tab, enable Dense Packing and Allow 90° turn (or Free Rotation).
Click Arrange. The engine will collapse the grid and interlock the identical copies into a highly dense block.
Handling Standard Rectangular Layouts
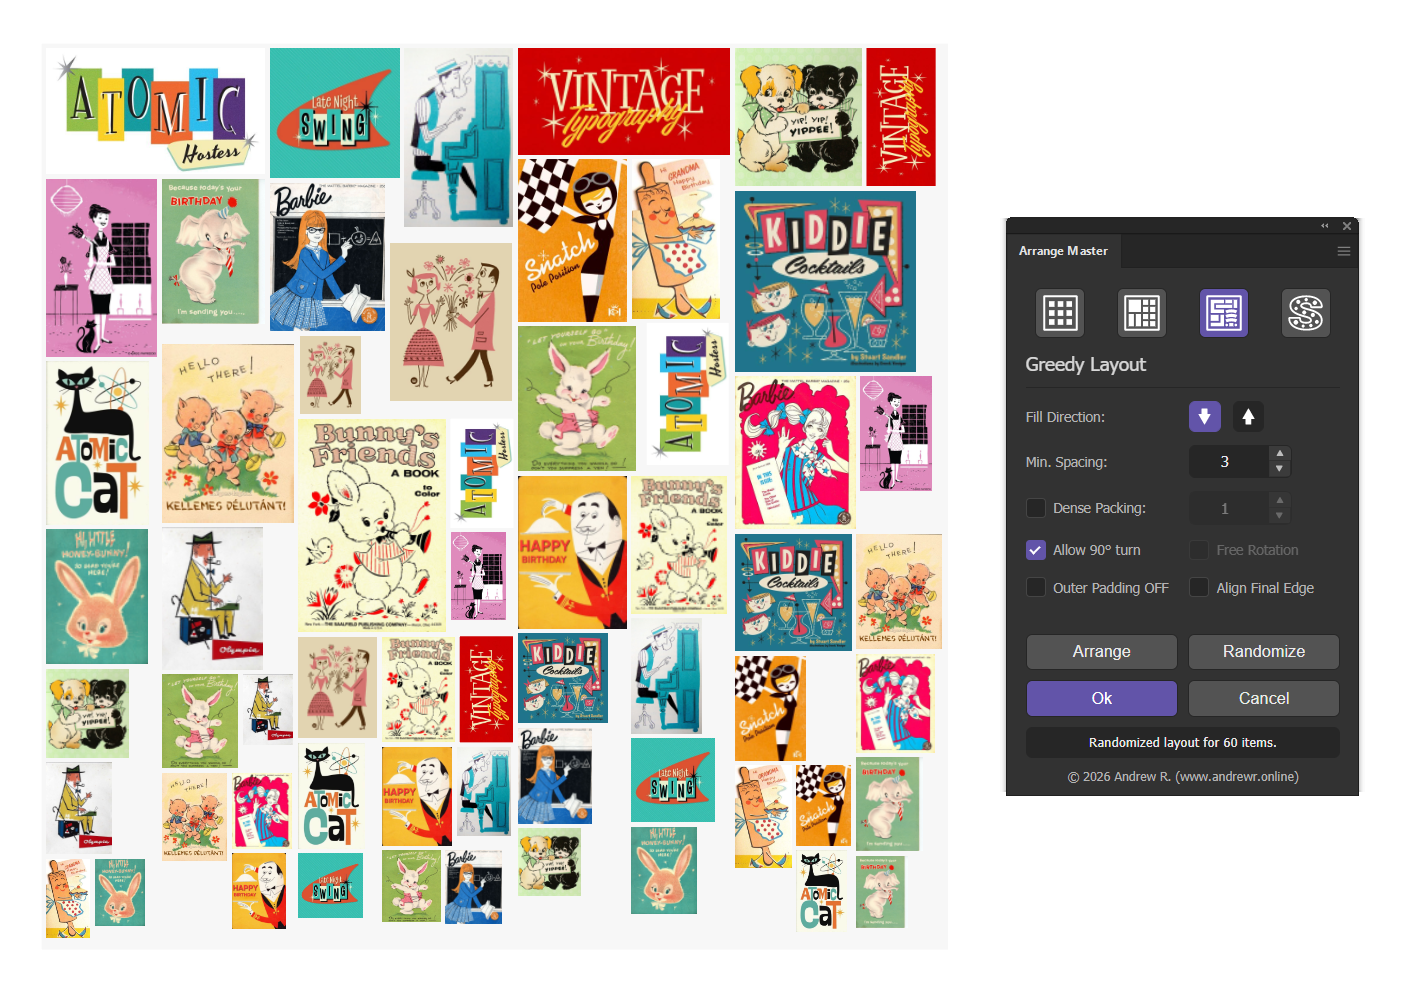
For standard rectangular objects like business cards, labels, or simple decals, True-Shape nesting is unnecessary and consumes extra processing power.
Instead, use standard nesting algorithms based on Bounding Boxes (BBox) by disabling Dense Packing in the Greedy Layout, or use the Knolling method for structured rows. This allows the engine to instantly calculate outer dimensions and use 90° rotations to pack mixed-size rectangles tightly, reserving heavy mathematical processing only for complex die-cut shapes.
Nesting Raster Images (PNG/JPEG)
The Dense Packing engine requires vector coordinates to calculate collisions. By default, it rejects raster images.
To tightly nest irregular raster images (like transparent PNG stickers), you must encapsulate them in a vector shell:
Duplicate the raster image.
Apply Image Trace to the duplicate to create a vector outline.
Use Pathfinder > Merge to merge the traced results into a single solid silhouette.
Place the original raster image inside this new vector silhouette using Object > Clipping Mask > Make.
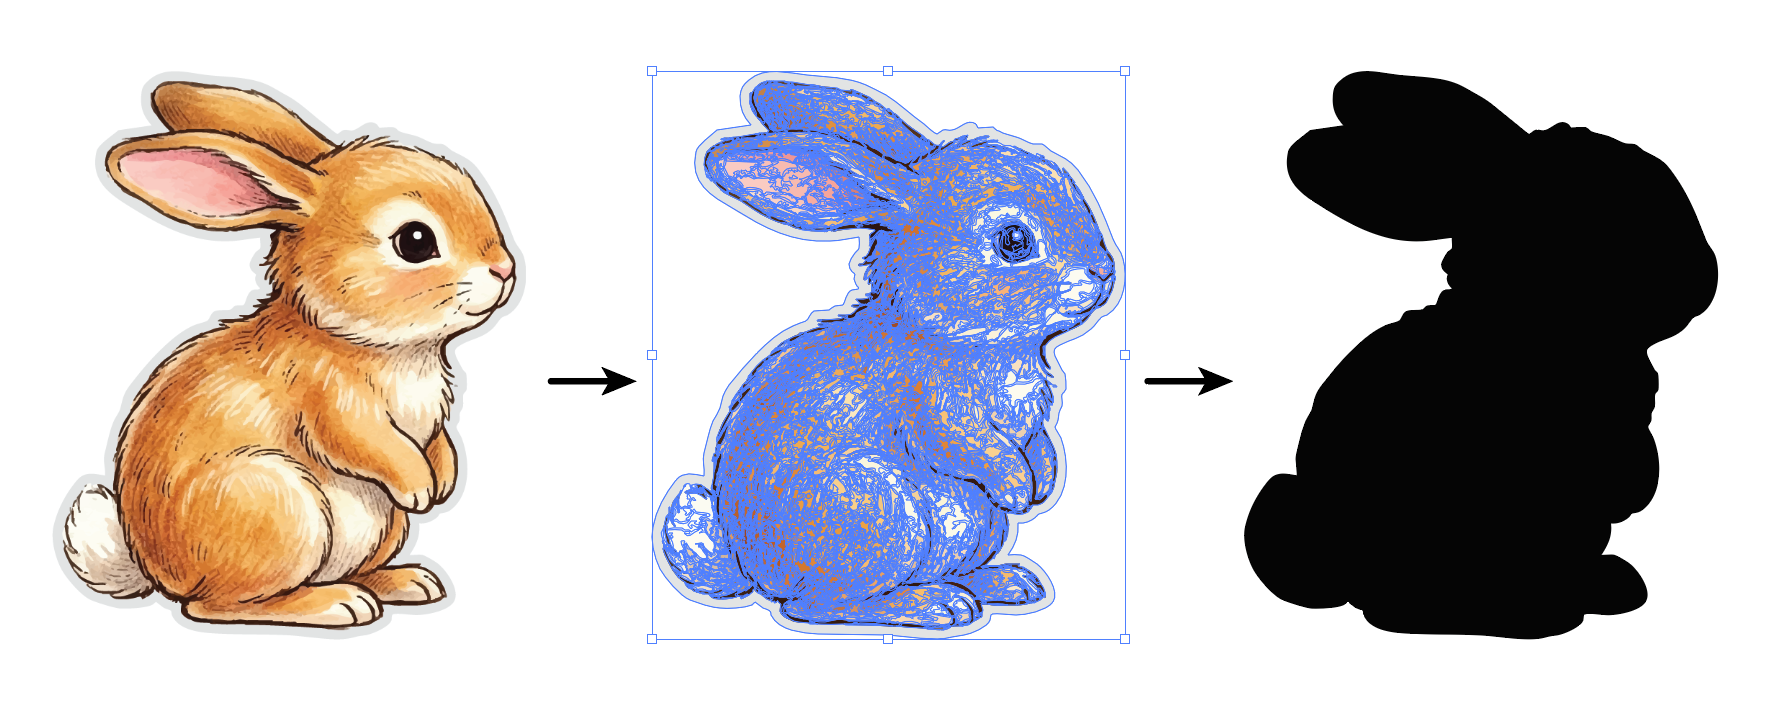
Arrange Master will read the vector path of the clipping mask, allowing it to interlock the raster images based on their exact visible contours.
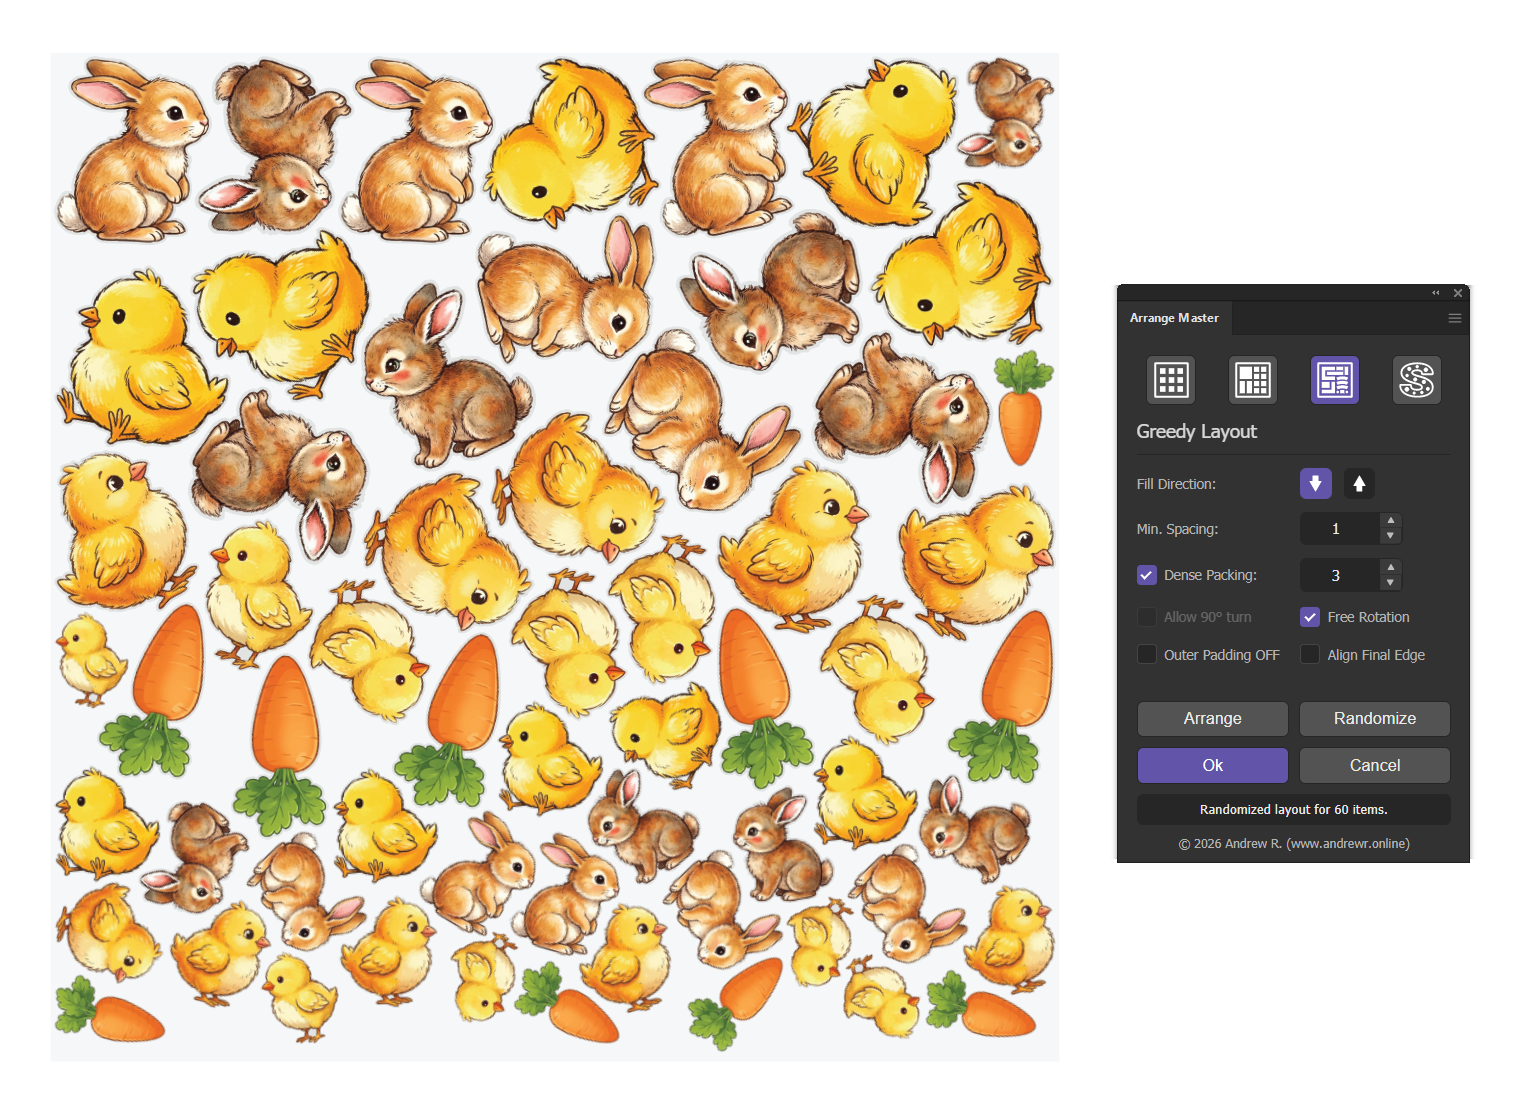
Configuring Spacing for Print Units
Accurate distance between cut lines is critical to prevent plotter errors. In Arrange Master, the Min. Spacing input field synchronizes directly with your active document units.
The stepper supports fractional values. If your document is set to inches or centimeters, you can type values like 0.15 or 0.5. The engine converts these fractions into exact pixel grids, ensuring the physical output matches your production requirements without rounding errors.
Fixing PDF Import Mask Bugs
Client files imported from PDF format often contain broken object hierarchies. Illustrator frequently inflates the bounding box of a PDF clipping mask to include hidden bleed areas or background textures.
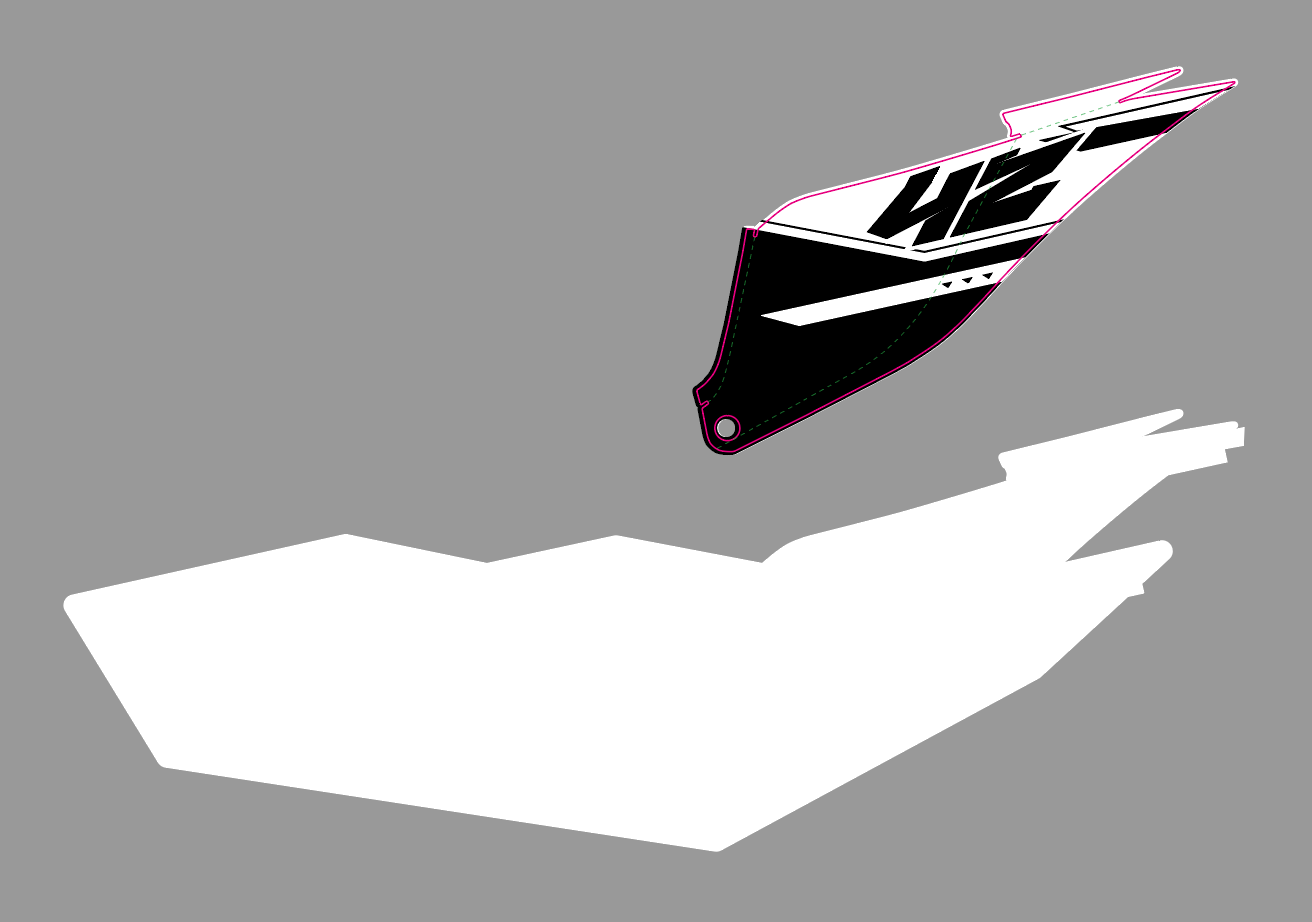
If a nesting tool uses these inflated boundaries, the objects will be placed too far apart. Arrange Master bypasses this Illustrator API bug. The script recursively scans the DOM structure of the group, isolates the explicit clipping path, and extracts coordinates solely from that vector. Hidden bleed data is ignored, ensuring the spacing remains accurate.
Conclusion
Manual arrangement of print files consumes labor hours and increases the risk of wasted media due to human error. By matching the correct automated layout algorithm - Grid, Knolling, or Dense Packing - to the specific object type, print shops can standardize their prepress preparation and maximize the yield of every printed roll.